|
 Part 1. Adjusting to Microsoft Microsoft Office 2010? Part 1. Adjusting to Microsoft Microsoft Office 2010?
By Mel Babb
Microsoft Office 2010 is quite a change from Office 2003 and earlier versions and has many changes from Microsoft Office 2007. If you’ve never used any of the Microsoft Office 2007 programs, you will be in for a HUGE adjustment. Gone are the menus you knew, replaced by the ribbon. The ribbon is a series of tabs across the top of the screen with a row of BIG icons under them. When you click a tab, the row of icons changes. Fortunately, when you point at or hover over (not click) on an icon, it pops up a tool tip with what the icon does. Since it often times only lasts a few seconds, you have to point away from it and back on it again, if you need to read it again. Unfortunately, many of the commands have been rearranged. If you have Windows 7 along with Microsoft Office 2010, you can maximize and restore a program simply by dragging the title bar to the top of the screen or dragging it off. This is real handy if you have two monitors, because you can’t move a program to the other monitor unless you have the program in the restore state.
It’s worth the effort to install and use the Interactive Guides. In Google type exactly ms office 2010 guides learn. Pick “Learn where menu and toolbar commands are….” Scroll to the Interactive Guides and click on one of the guides. Click install in the window that opens. (The first time you will get a message about Starlight, Click yes.) Since this guide is added to the Start Menu, you don’t really need to have it on the desktop. Another window opens, which has an uninstall button on it. Click the X in the right corner to close it. And Click Close in the next window. Now you can install another program guide since you have closed the previous one.
To use a guide, open and minimize it for quick access. Just click start and type interain the “Search programs and files” box at the bottom of the menu. All the guides appear at the top of the menu. Click the one you want. Click Start. Then just click the command you want from Word 2003 or before. The screen flips to where the command is in 2010. Click anywhere on that screen (not just on “Try another command”) to return to the 2003 look. Keep the guide minimized so it opens fast when you need it. And you can have more than one guide open once you have it installed.
New File Types
The programs have new formats for saving files (started in Microsoft Office 2007). The default saves the file as a .docx type in Word, .xlsx in Excel, etc. If the file has macros in it, using Word as the example, the type is .docm. To be sure people who don’t have the new Office 2003 or 2007 can read the file, save the file as .doc. A compatibility box will pop up showing what features will be adjusted because they are not available in the older Office versions. Now you can save directly to a .pdf file. Also, most useful in Outlook and Internet Explorer, you can save to .mht, which makes one file. (If you use .htm, it makes a folder and a file.) …”
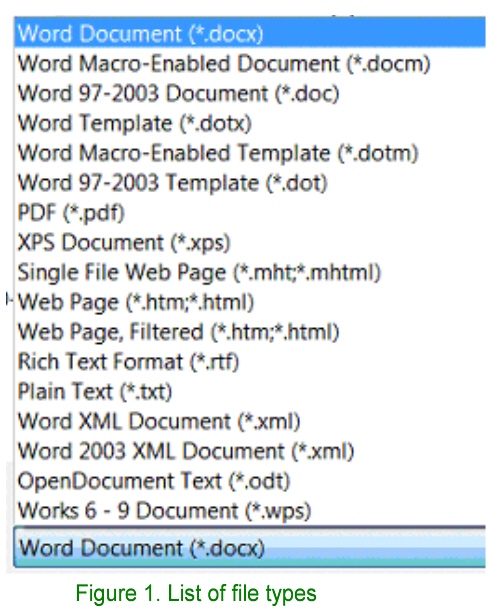
See Figure 1 for complete list of extensions in Word. By the way, if you have the older Office versions of Office, you can download the free Compatibility pack so you can open the new files. Search for install compatibility pack and pick the one “How to install.
Do take the time to look at the “manual” in Windows 7. Click Start, Help and Support. To learn what’s happened to Windows Explorer, choose “Learn About Windows Basics”. In the Programs, files and folders section click “Working with files and folders”. It explains libraries where you can link to other drives, even your USB thumb drives. To better get a grasp of what all the programs do now, search for videos and tutorials on subjects of interest. The screen is so interactive now, it helps to see what to do while someone explains it.
Happy Computing.
Read Part 2.
|