
The Name | 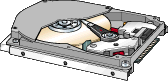 | by Joseph Delancy |
One of the most-asked questions by new computer users and perhaps most confusing exercises with a computer is how and why to create partitions on a hard disk. When you consider the growth of Graphic User Interface (GUI) programs that demand so much hard disk storage space, the obvious solution is to buy ... a larger disk or buy a second disk. When buying either, the partitioning procedure is important if you wish to gain the maximum amount of storage in an efficient manner. I've seen 540MB hard disks being used as a single "C:" drive which permits much wasted space on the disk. If you are using "XTREE GOLD" on your computer, press the Shift+? keys to view a data menu of among other things, a line titled "Slack Space." If the amount of "bytes" in the slack space exceeds 5% of the total bytes available on this drive, you're wasting storage space.
What is "Slack Space"? First, let's review what happens when you format a floppy disk. Depending on the size of the disk, (360K, 720K, 1200K or 1440k) concentric circles/tracks are magnetically impressed, similar to a phonograph record except each track doesn't physically touch the adjacent track. The disk is also "Pie Sliced" into "Sectors" and each track and sector is then addressed to a "File Allocation Table" (FAT) located at the beginning of the disk. The more dense the magnetic material, the more tracks/sectors may be created on the disk, e.g., each side of a 360K disk has 40 tracks and 9 sectors while a 1440K disk has 80 tracks and I 8 sectors each side.
Allocation Units
When Microsoft DOS code was written, consideration was given to combining
these small sectors into "cluster" sizes ("Allocation Units"
today). Since each track/sector contained 512 bytes on each side of the disk,
the over and under read and write arms of the disk drive ("O" and "I"
sides) would each read 512 bytes per sector. However since many files are much
bigger than 0.5K size, Microsoft created clusters of sectors to be written:
360K disk has 2 sectors/cluster, 1,024 bytes;
720K disk has 2 sectors/cluster, 1024 bytes;
1,200K disk has 1 sector/cluster, 512 bytes;
1,440K disk has 1 sector/cluster, 512 bytes.
From the above we can see that a 500 byte size file on a 360K disk would therefore fit into a cluster (2 sectors) leaving 524 bytes of wasted "Slack Space" but written to a 1,440K disk would leave only 12 bytes of wasted slack space.
Looking into cluster sizes of hard drives, Microsoft realized that files are written to the next available blank spaces sequentially onto the hard drives.
If you delete several small files/application programs randomly located on
a hard drive, the large files of an application program you wish to next
install will be scattered throughout the hard drive in lieu of being installed
in a contiguous manner. Reading the larger program files will be time-consuming
since the read arms of the hard drive must now search a wide area of the drive
seeking the file data. The Microsoft solution was to create small cluster sizes
for the smaller hard disk partitions containing smaller files and larger
cluster sizes for the larger hard disk partitions containing larger files,
e.g.:
16 Megabytes (MB) up to 128MB, the cluster size is 4 sectors/2,048 bytes
(2K)
128MB to 256MB, the cluster size is 8 sectors/4,096 bytes (4K)
256MB to 512MB, the cluster size is 16 sectors/8,192 bytes (8K)
512MB to 1,024MB, the cluster size is 32 sectors/16,384 bytes (16K)
1,024MB to 2,048MB, the cluster size is 64 sectors/32,768 bytes (32K). If
we single partition a 512MB hard disk and create a 512MB hard drive, you can
see the waste of 16K (16,384 bytes) clusters when we write a 1,000 byte file to
that cluster: i.e., 15,384 bytes on this cluster are unusable as "Slack
Space." The method we use to create hard drive "Partition"
and "Cluster" sizes is a DOS program called "FDISK."
Note: Before running the FDISK DOS partitioning, it is important that
you have a "Bootable Systems Disk" with both "FDISK and
FORMAT" files on that disk. After physically installing a new hard
disk or two, place the bootable system disk in drive A: and power up the
computer. You must next change the "CMOS Setup."
Changing the CMOS Setup The "CMOS Setup" is changed during
boot up to define the correct "parameters" for the new hard disk(s).
For example, the "AMI BIOS" requires pressing the delete key during
boot up to access the CMOS setup. Most hard disk manufacturers label the disk "Parameters"
on the disk so be sure to copy them so they are available to write to the "CMOS
Setup." After saving the CMOS changes, we continue to boot into the A:
drive using the bootable system disk. The next step is to type FDISK and press
enter. We are now ready to define the partition sizes for our new hard
drive(s). The FDISK partitioning menu first displays "FDISK Options"
and the "Current fixed disk drive: I," You are prompted to "Choose
one of the following" options:
1. Create DOS partition or Logical DOS Drive
2. Set active partition
3. Delete partition or Logical DOS Drive
4. Display partition information
5. Change current fixed drive Enter choice [1] Press Esc to exit FDISK
Pressing the enter key will change the menu display to "Create DOS
Partition or Logical DOS Drive" and "Current fixed disk drive: 1."
You are prompted to "Choose one of the following" options:
1. Create Primary DOS Partition
2. Create Extended DOS Partition
3. Create Logical DOS Drive(s) in the Extended DOS Partition. Enter choice:
[1]
Press Esc to return to FDISK options Pressing the enter key will display another menu to permit the sizing of the Primary DOS Partition in either a percentage or megabyte size. Caution: Select one megabyte lower than the high-end size of a partition; e.g., if you select 128mb as a partition, your cluster size will be 4,096 bytes (4K), not 2,048 bytes (2K). This holds true for 512K, 1,024K, etc. The Primary DOS Partition You can only create one Primary DOS Partition regardless of how many hard disks you install. If you created a 127MB primary drive of disk 1, you must select option 2 above and create the remaining disk space as an "Extended DOS Partition." Even if the remaining disk space is 400MB, all of it must he established as an Extended DOS Partition. You must then select 3 above to create "Logical DOS Drive(s). These logical drives can also be selected as a percentage or a megabytes size. You may create as many logical drives of this remaining extended partition as you wish. Each of the logical drives are given a drive letter such as "D:," "E:," "F:," etc..
Returning to the original "FDISK Options" menu, you must select "Set active partition." This creates/allows you to boot up the "C:" drive. If you have a second hard disk, while still in the FDISK options menu, select "Change current fixed disk drive" and select disk 2 and press enter. Again you will go to the "Create DOS Partition or Logical DOS Drive" menu as defined above, however the "Current fixed disk drive: 2" will appear. Select "Create Extended DOS Partition" of the Entire Megabyte or 100% size of this second hard disk. Back to the "Create DOS Partition or Logical DOS Drive" menu, you must now select "Create Logical DOS Drive(s) in the Extended DOS Partition." From here you may create one or more additional hard drives as a percentage or a Megabyte size until you use up the total extended/logical drive space. Each drive you create is automatically assigned the next drive letter. Remember to size your drive to accommodate the cluster/allocation size to minimize wasted slack space.
At the FDISK Options menu, you may select "Display partition information" for either disk I or 2. If you are satisfied with the partition sizes, press Esc to return to the A: drive. You must now type FORMAT C: /S and press enter. This places the hidden files on the C: drive and permits you to boot up. While still in A: drive, type FORMAT D: and press enter. Repeat this Format Command for the E:, F:, G:, etc. drives as necessary until you have formatted each drive you created. Use the /S switch only on the Primary, Active C: drive. Remove the Bootable A: drive disk and press the Computer reset switch to reboot into the C: drive. From this point you need to install your DOS operational files to the C: drive and any other application programs to the drives of your choice.
Changing or Deleting a Partition
In the future if you wish to change of delete the partition(s), you must work backwards, i.e., from the "FDISK Options" menu, start with disk 2 and delete the logical drives, then the Extended DOS Partition. Next select disk I and delete: the logical drives, the Extended DOS partition, and finally the Primary DOS partition. CAUTION: Be sure to back up your files data (include your Autoexec.Bat and Config.Sys files, and the software you'll need to restore your backup) since re-partitioning will wipe out the hard drive(s).
Minimize the Slack Space
If you did create various multiple size partitions, install the small file programs into the smaller partitioned hard drives and install the large file programs (Graphic Applications) into the larger partitioned hard drives. In this manner you will have minimized the wasted "Slack Space" and created efficient "Partitions."
Reprint from I/O, the official publication of the Kentucky-Indiana PC User Group.
E-mail me at webmaster@hal-pc.org with any comments you have and tell me what you want to see here.
Back to the User Journal Home Page