Movie Moguls Make It
Happen: Video Editing
by The Reviews Team
Preface.
- These three software programs are a follow up to the article video
capture devices. Now you’ll have everything you need to be your own
Movie Mogul! Notice that all three reviewers strongly suggest that you read
the user manual. This is not necessarily because the program
is so complicated, but there are many features and options and you’ll
need to know when to use and how apply them.
- As I mentioned in April’s reviews, you’ll need a fairly
powerful system which includes a significant amount of HD space which must
be capable of sustained throughput of at least 4 MB/sec. All SCSI and most
UDMA drives are fast enough (dedicated hard drive recommended). Have no other
programs running and defragment your HD before every big session.
- As always, go to the vendor’s web site for program updates and/or
patches.
Enjoy. Charles W. Evans, Reviews Editor
PS: Watch the Class Schedule
for a “Video Editing” class
this summer.
 Power Director 3, by Robert Du Vernay Power Director 3, by Robert Du Vernay
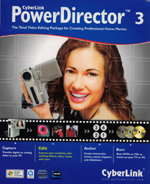
Power Director 3 , by CyberLink, presents the
four functions necessary for to make a DVD/CD copy of your movie or videos.
Director 3 will Capture your video (you’ll need a separate capture
device), assist you in Edit, provide an Authoring process
and will do the Burn your CD/DVD. This package comes with 190 pages
of actual, printed documentation! You should look over and read
the documentation. Video editing/creation is easy enough with this product
but the operator (that’s you) does have to know what to press and when.
Reading the documentation is a lot easier than having to go to a web site or
view an electronic file when I need an answer! The interface is highly institutive,
clear and readily understandable - a clean feel.
Capture: Straight from your DV/D8 recorder,
directly from TV (is this TIVO - no, you need an analog/digital capture device),
from a WEB cam, and analogy capture. You are only limited by what hardware
and hard drive capacity you have at hand. A utility package is also provided
which will capture VHS analogy video/audio, so don’t throw those old
VHS tapes out. It also rips CD audio into MP3 files and provides VOX capture,
if you want to dub. All of these various inputs are organized in the Media
Library; this is good. The original item is preserved, and you pull copies
into the current project. You can screw up, just don’t ‘delete
from disk’ that is fatal. It don’t go thru the recycle bin, I promise
you.
Edit: Just what it says! You can split a
clip, chop it up, move ‘um about on a time line. And then, “glue” them
back together, which is the trick. Either you move the “clip” to
include or exclude frames or you and do it with a time key, going down to a
1/100 of a second cut. There is a frame advance button, which lets you position
exactly to cut out a commercial from a recording, like a pro…right down
to the beginning of the fade. You can grab a SnapShot for a title
or just take a still. This adds new dimensions to Digicam footage, after the
fact. Mute/fade out/override the existing audio track adding our music, effects,
change volume…its all there. There is a handy preview window to check
what you got, with a one click. Don’t forget to backup the project
along the way.
Author: There are simply more options than
space permits. PIP is interesting…but my TV isn’t big enough to
enjoy that one. The final audience is the key determinate at this stage,
you want to make a Streaming video (Quick Time) for the internet,
copy it back in DV source, make a VHS, just a DVD / CD or …choice is
yours. Put the titles and menu together, run in any special effects, audio
or visual and go for it. Some review/re-reading of the documentation maybe
in order.
Burn: Need a slide show? You can dump onto
a CD/DVD and package it all up with a driver program, so Aunt Tilley in Kansas
can play it on her computer, then punch out X copies of same! Disc utilities
are provided so that you can erase those RW items, and even defrayment your
hard drive. Also, duplicate a DVD. The speed of transcoding and re-compression
was very good. My resulting DVD-RW output was ok, wouldn’t play in my
DVD player but that is nothing new. As I said up front, this is a nice product.
After you get your Power Director 3, check immediately for program updates
on their web site. They offer FREE Trial products. I did have trouble capturing
from my analog card. Power Director 3 recognized my capture card and the audio
connection but the capture failed. So I imported my MPG3 clips directly into
the project and took it from there. All in all, this is an impressive product
suited both for the inexperienced “editor” and more advanced users.
I must stress that Power Director 3 and most of the newer video editing suites
all require a top end CPU environment to operate effectively. For more info
and updates go to: www.gocyberlink.com.
Robert Du Vernay is a HAL-PC member and is the senior instructor for the
CD Burning for Everyone and DVD Burning for Everyone classes. He can be reached
at rpd@hal-pc.org.
 Pinnacle Studio 9: Simple, Powerful,
Creative, by Jannice D. Morris Pinnacle Studio 9: Simple, Powerful,
Creative, by Jannice D. Morris
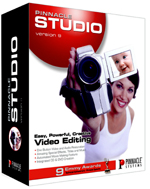
Studio 9’s main interface screen is simple, easy to
navigate and understandable. Start by importing your digital file which you
can either preview, then edit and burn to a CD or DVD. This
program simplifies the movie making experience. New, advanced features include
automatic editing capabilities and powerful one touch controls for improving
old or damaged video. For the adventuresome, Studio 9 debuts new, powerful,
creative options including audio tools for producing cinema quality movies
and support for third party audio and video plug-ins.
Edit is the most extensive and time consuming if you choose to use too many
features. Is it a favorite TV program? Use time slice to remove the commercials
and insert a unique title with your own voice over (you’ll need a mic
and sound card). The initial screen couldn’t be simpler. There are three
tabs: Capture, Edit and Make Movie. There are many “hot spots” on
this screen - ones that will appear when you make specific selections - very
nice. And no wading through drop down menus, etc. Well designed.
Drag-and-drop your captured video footage onto the
editing timeline or storeline (your choice, but I prefer the timeline) and
quickly assemble a movie. Other features include the ability to import CD,
MP3 and WAV audio files into your timeline, and export still frames that can
be sent to your printer.
Want to quickly turn your recent holiday video into an enjoyable movie?
Let SmartMovie edit your movie for you! With Studio's automated editor,
you simply choose a video and song from your hard drive and select an editing
style. With one click, Studio creates a professionally edited movie-complete
with titles, transitions, and special effects-all synchronized to the beat
and duration of the movie.
Edit movies, add titles, music, narration and special effects and then output
a finished movie back to analog videotape, DVD and the web. Pinnacle Hollywood
FX Plus, which provides hundreds of additional 2D and 3D transitions
and video effects. Makes it easier than ever to add titles, transitions sound
effects and background music to your movies.
Product Highlights:
- Edit footage from your DV, Digital 8, digital camcorders or footage
from VCR or analogue camcorders
- Edit widescreen (16:9) or standard (4:3) video
- Preview window shows your edits immediately5.
- Advanced timeline features for frame-by-frame editing (great feature)
- Audio Features and Effects
- Import background music as MP3 files or rip directly from an audio
CD
- Record your own voiceover narration
Audio and video restoration tools:
- Image Stabilization -fix those shaky handheld shots
- Analogue Cleaning - restore old videotapes
- Image Filters - create exciting video effects, such as Old Time Movie, Lens
Flares, etc.
- Fix poorly shot footage using Studio's new cleaning and restoration
tools
Output Formats : (no DivX)
- Output to VHS or digital tape
- MPEG-1, MPEG-2, or AVI
- RealVideo 8, Windows Streaming Format
- Video CD, S-Video CD or DVD
- Widescreen (16:9) or standard (4:3) video
- Windows Media 9
The Basics: Simple as One, Two, Three
Studio 9 software is as simple or advanced as your movie maker needs demand.
Step one, is a fast automated import and logging of raw footage into albums
from almost any camcorder or other digital source. Step two, imported footage
is transformed into your story with one click using the SmartMovie feature.
For the more advanced devotee, Studio 9 combines a multitude of creative
editing tools and powerful features that include transitions, titles, video
and sound effects and automatic or imported music making options. At step
three, after your movie is completed, it can be burned onto a CD or DVD,
transferred to tape or published on the web. You’ll have a tendency
to use many of these. Don’t. Use these effects sparingly for the most
dramatic effect.
Studio 9 is a vast improvement over vs. 8 and contains as much or as little
as you wish to use and it is fairly easy to use most features. I forgot to
include in last month’s mini-review how very nice it is to have a real,
helpful and informative PRINTED user manual. A well illustrated, 282 pages
of practical assistance, but you have to read it ! This is a powerhouse,
versatile program that a novice can appreciate. For more info and updates go
to www.pinnaclesys.com.
Jannice D. Morris is a HAL-PC member who is a staff archivist
for a graphic conversion firm.
 Ulead VideoStudio 7: Surprisingly Capable, by
Rodger Marion Ulead VideoStudio 7: Surprisingly Capable, by
Rodger Marion
I produce short video lectures that are part of courses I teach. They are
available to students on the Internet as streaming video files. Recently I
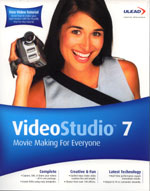
filmed a new lecture and used UleadVideoStudio
7 to edit it.
Installation and Setup - Installation on a laptop (2GHz Pentium 4M processor,
512MB of RAM, Windows XP) was simple. After installing from the CD, I installed
an updated version from the Ulead web site. Generally, I accepted the default
preferences with two exceptions. Whenever you add a clip to the time line,
the program inserts a transition effect between them, and so I set the default
to be a crossfade. Also, to be able to use the Split-by-Scene feature, I set
the Capture Format to DV mode. I did not need technical help, but the Ulead
web site offers a number of support options.
Capture - The video and audio were recorded using a DV camera and a wireless
lavaliere microphone. The video was transferred to the laptop using the Firewire
(IEEE 1394) interface without problems. Whenever I stopped the camera between
shots, VideoStudio divided the material into separate clips and put them into
the Video Library.
Assembly and Trimming - I selected five clips for the final movie and dropped
them on the timeline. VideoStudio put a crossfade between each shot. After
selecting and trimming the shots, I saved the file to work on later. Upon opening
the file the next day, VideoStudio could not find any of the clips and I manually
re-linked each one. The remaining project information was intact and later
I saved and opened the project file and it found everything. The previews played
back well both on-screen and on a TV. Overall, work flow is often cumbersome
as the program tries to “help” you at each step of the process.
Audio - VideoStudio has several options for audio, and at least one limitation.
I wanted to remove a few extraneous sounds from a clip. I could split the audio
from the video and then I could adjust the volume of the whole clip but not
portions of it. On the plus side, you can add a Voice and/or Music track. You
can record a voice-over audio track, and you can record music from a CD. Also,
audio files can be imported and dropped to either the Voice or Music tracks.
I used one of the music files provided to add music at the beginning and end
of my lecture.
Titles - The title tool was fairly flexible. I needed to create four titles
and while it remembered the font, initial font size and color, I had to manually
redo the title duration and shadow parameters each time. I shot the video in
16:9 aspect ratio, and the program does not recognize this format so the letters
in the titles are stretched horizontally when viewed in 16:9. Regardless, the
titles do look good.
Output - My lectures are available to students as RealVideo files. I discovered
that while VideoStudio would create RealVideo files, I had no control over
the properties of the output file. The properties are fixed as 320 x 240 and
8 Bits Mono. My video was shot in 16:9, and I needed to output it at 312 x
176 and 16 bits stereo. So, I had VideoStudio output a MPEG-2 file and I ran
it through Discreet Cleaner XL to create a RealVideo file. You can view the
lecture, using the RealPlayer, at teamideal.utmb.edu/de/reflection_7.ram.
Conclusion - Ulead VideoStudio 7 is a very capable program within its limitations.
The documentation is clearly illustrated and useful. Please read it. There
were a number of things I could not do with it, but I am quite happy with the
movie that I edited. VideoStudio is a reasonable, economical, and straightforward
option for the novice video maker, but will satisfy more sophisticated users. As
a professor, I give a B+. For more info and updates go to www.ulead.com.
Rodger Marion is a HAL-PC family member and member of the Telephone Help
Committee. He develops movies of simulated patients for the University of
Texas Medical Branch, where he is a professor. Web site - www.corsairstudios.com and contact at rmarion@hotmail.com.
|

