|
|
The GIMP, by Robert SpotswoodOpen source's answer to PhotoshopWith consumer digital cameras becoming more and more common, so are digital pictures. Unfortunately, bad digital pictures are also becoming more and more common. While tips on taking good pictures are beyond the scope of this article, pictures you already have taken can sometimes be salvaged, and most of the time improved, with some good photo editing software. In addition, those pictures can be cut, folded, spindled, and mutilated to form new, sometimes better, pictures. There are a number of commercial photoediting software titles available, including Paint Shop Pro, Corel Draw, Picture It!, C1, and PhotoImpact. But the big name in graphics programs is Photoshop. It is extremely powerful, but is also expensive (~$650 MSRP). A cut down version of Photoshop called Photoshop Elements is only ~$99 (MSRP, street price a little less). Sometimes people will use whatever came with their scanner or digital camera. This software tends to offer few options and is only a pale imitation of any software listed above and the GIMP. However, all the software above has two things in common. None is available free (legally) and all of it only runs on MS Windows. If you want to use another operating system, you can't use the software natively. This is where the GIMP comes in. It is the only graphics manipulation software available for multiple platforms (MS Windows, Mac, and most Unix including Linux) and for free. Access to the source code and the right to modify it (and distribute your changes) is also available for free, something none of the others offer. Zero Cost, Full Power Don't let the cost fool you. Just because the GIMP is free doesn't mean it isn't powerful. An easy way to start a flame war on the Internet is to say the GIMP is better than Photoshop (or vice versa). There are some things the GIMP can do better and there are some things Photoshop can do better, but there are very few things that Photoshop can do that the GIMP can't (yet!). Almost all of those revolve around pre-press work, which is something most home users won't need. All the power tools a graphic artist would expect are available in the GIMP. Layers, masks, channels, paths, the clone tool, gradients, cropping, resizing, multiple picture format support, shearing, rotation, perspective, and more. A number of filters allow you to do other interesting transformations and improvements to your photos.
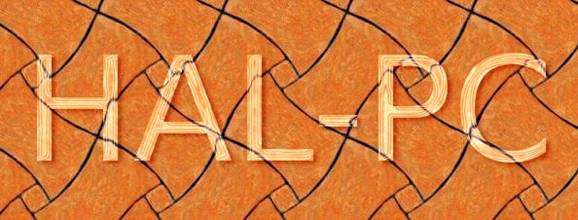
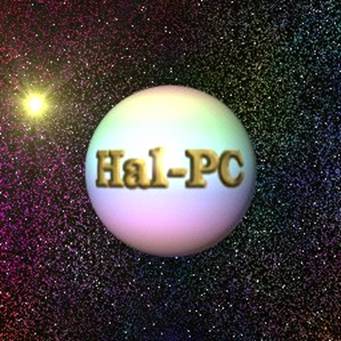
Figure 1: Final composite image For instance, figure 1 was created from the (full-sized original) 3 pictures in figure 2. The frame was created on the fly in the GIMP. This is an example of the cut, folded, spindled, and mutilated.
Figure 2: Sources for the composite picture The Learning Curve
Figure 3: Logo from scratch in under a minute Working with digital images requires some understanding of what you want to do. If you want the best results, it will almost never be "pick a tool, one click and you're done". This is true for all graphics programs, and the GIMP is no exception. However, the GIMP comes with a host of pre-programmed tools that can help do a variety of jobs. Some can even generate graphics starting from nothing. For instance, figure 3 took less than 1 minute to create from scratch using one of the scripts. The script did nothing that could not be done by hand, but it did do it faster. The GIMP is fully scriptable, and you can write your own scripts or add ones others have written. You can also create your own art in the GIMP by hand as well. Figure 4 took about 20 minutes to create from start to finish (some of which was figuring out what to create).
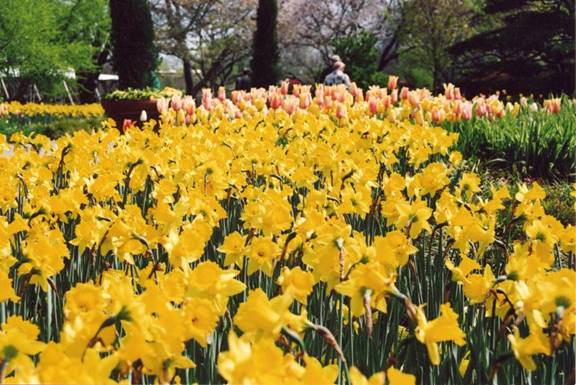
Figure 4: The GIMP art created by hand Mastering any advanced graphics program, the GIMP included, takes time, patience and studying, but the GIMP has a number of free resources available to help master it. First is the GIMP User's Manual (http://docs.gimp.org), and the second is "Grokking the GIMP". "Grokking the GIMP" is available in both book form and as a free download (http://the GIMP-savvy.com/BOOK/). Beyond those are the GIMP help files, and online tutorials too numerous to list. There are also several other books on the GIMP that can be purchased and Usenet offers the comp.graphics.apps.gimp newsgroup if you need additional help. There are also several mailing lists available as well. Many of the tutorials and books are for the 1.2.x version of the GIMP. Between versions 1.2 and 2.0, the menus have been rearranged to try to make the GIMP easier to use. However, virtually all of the tutorials still work if you are willing to search through the menus when something isn't where it's supposed to be. People new to the GIMP should look at the introduction to the GIMP (http://members.home.nl/m.weisbeek/the GIMP/). Be warned that the interface does take some getting used to, but can be quite easy to navigate once you do get used to it. One little known tip for using the file open/save dialogs is to use the tab key. Type in the first letter or letters of what you are looking for and press tab. The box will now only show files and directories that start with what you've typed in. Improving Your Pictures Don't be put off by the amount of learning you have to do to truly master the GIMP. For those looking to improve your pictures, it only takes a few minutes of study to learn how to use perhaps the two most useful tools for improving your pictures: the levels and crop tools. The auto button for levels works wonders most of the time. Compare the two pictures below. The first is the original (scan) while the second has had auto levels applied. Notice how the colors are better now. While the effect can sometimes be subtle, it does make a difference in how your image is perceived. In addition, haze and cloudiness can sometimes be removed as well, if they are present.
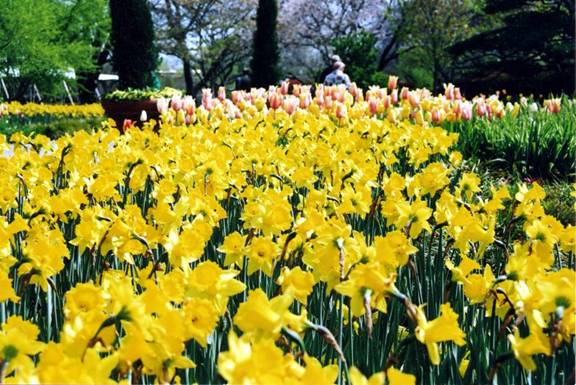
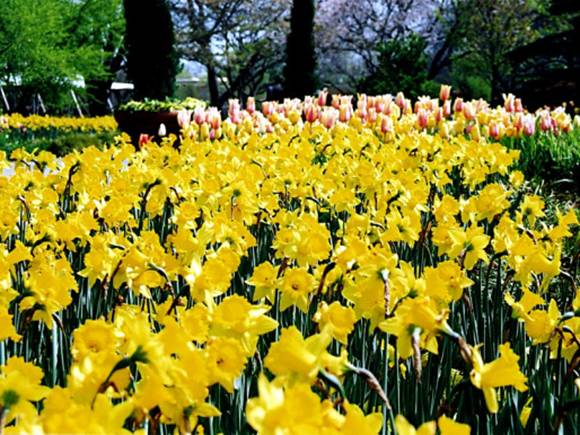
Figure 5: The raw scanned image The third picture is the final version. The final involved some use of the clone tool to remove the people (above the tulips and the part of the person just showing behind the left tree) and several other minor enhancements.
Figure 6: After applying auto levels
Figure 7: Final version Getting the GIMP For Windows users, there are two versions of the GIMP. The 1.2.5 version is recommended for Windows 95, 98, and ME, while the 2.x series is recommended for Windows 2000 and XP. There were a number of refinements made to the interface between the 1.2 and 2.0 series, but 1.2 can still do everything that 2.0 can do. However, some things are easier to do in the 2.0 series, especially working with text. Windows users can download the GIMP installer from http://www2.arnes.si/~sopjsimo/theGIMP/ . The stable version is 2.0.x and the previous stable version is the 1.2.5. You must also install the GTK program or the GIMP will not work. In addition, you may want to download and install the help and animation packages. The first time you run the GIMP, a setup wizard will appear. The GIMP will also take longer to start the first time. Also, you may see a DOS window open at some point. Just minimize it. If you close it, the GIMP will close. Linux users may already have the GIMP installed; and if they don't, they should look to their distributions for installation methods. Knoppix (a live Linux CD) comes with the GIMP already installed. Conclusion If you're looking for advanced photo editing, graphics manipulation software, you need look no further than the GIMP. It can compete with the commercial programs at a price and openness that can't be beat. With a $0 cost and ability to give away copies to all your friends, there's no reason for anyone to be without quality graphics/photoediting software anymore. Read a tuorial about using the GIMP Robert Spotswood, a HAL-PC member, is active in the Linux SIG and a freelance computer professional. He can be reached at robert@spotswood-computer.net. |
2004 Robert Spotswood, a HAL-PC member, is active in the Linux SIG and a freelance computer professional. He can be reached at robert@spotswood-computer.net |