|
|
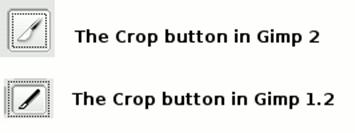
The GIMP, by Robert SpotswoodFirst Steps with the GimpCropping and Auto Levels While the GIMP features a large array of tools and methods designed to help you modify your pictures, perhaps the two most useful tools are the crop tool and the auto levels function. Both are simple to learn and use, and can give excellent results. Cropping Cropping is a technique for removing parts of the picture with the intent of improving it or to resize it without shrinking your main subject. Cropping can help to enlarge the main subject, remove distracting or boring elements, and change the composition of the picture. Where to crop is often an artistic call and each picture is unique in its cropping needs, but it's rare to have a picture that can't be improved by cropping. Step 1: Open the picture you want to crop. Step 2: In the main gimp toolbox, click on the crop button or use the keyboard shortcut Shift-c.
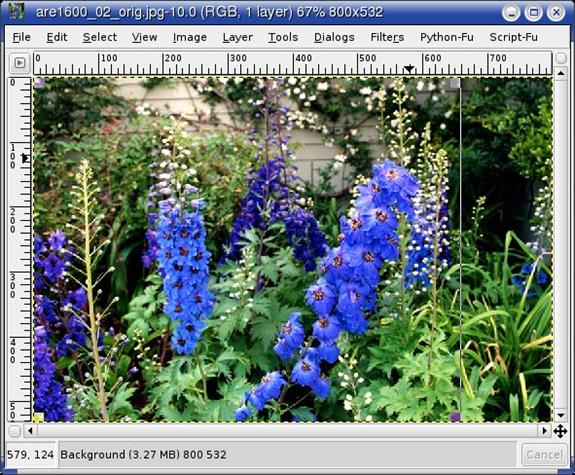
Figure 1: The crop buttons Step 3: Click and drag on your picture to create a box. Don't worry if it isn't the exact size and placement you want. As you do this, a window will open (this is sometimes why you don't get the placement you wanted). Just move it out of the way for now.
Figure 2: The crop selection
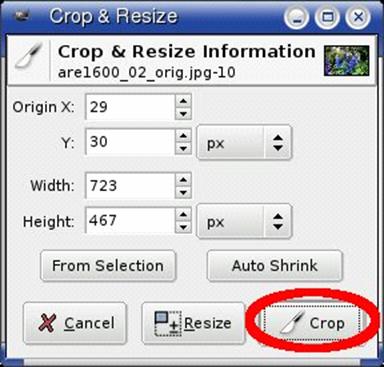
Figure 3: Crop window Step 4: The 4 blocks in the corners of the box you just created allow you to resize and move the box. What is inside the box is what is will be kept. Everything outside the box will be removed or cropped. The upper left and lower right boxes allow you to resize the crop area, while the upper right and lower left boxes allow you to move the crop area. The crop area is always rectangle shaped. The cursor will change shape depending on which box you are over. Click and drag to make your changes. Do not worry about making mistakes, because no changes to your picture will occur yet. If you need fine grain control, the window that opened earlier can be used to adjust your box size and placement. Origin refers to the upper left hand corner of the crop box, while the other two numbers refer to the size of the crop box. The numbers can be adjusted by either using the little up/down arrows to the right of the number, or by clicking in the box and entering a new number. It is possible to move the window outside the area your picture occupies. In this case, you will be left with the only the area of the picture the box does cover.
Figure 4: The crop box final selection Step 5: Once you are satisfied with your crop area selection, click on the crop button in the window that opened earlier. Note that your numbers will almost certainly differ from the ones shown in figure 5. This is normal. Each picture is different.
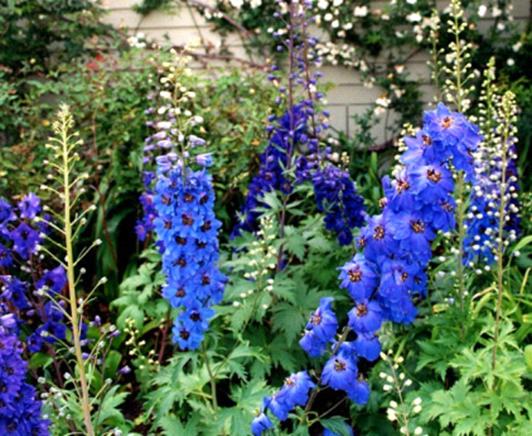
Figure 5: Finalizing your crop The resulting picture had the area on the right removed. It was distracting and added nothing to the picture.
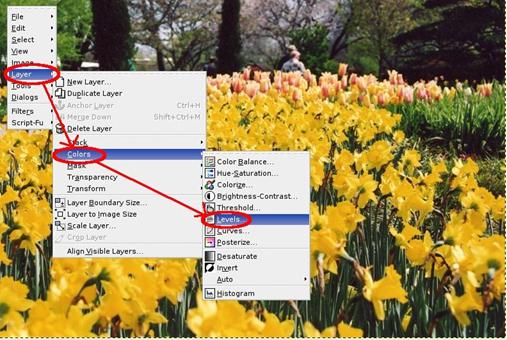
Figure 6: The cropped picture Auto Levels Using the auto levels is usually the easiest thing you can do to improve your pictures. It re-balances the colors. You will have pictures where the whites aren't white and the blacks aren't black. Levels helps to correct this. Both the contrast/brightness and the curves tools do similar functions. However, the contrast/brightness tool is very simplistic in its approach to editing. One size fits all. Usually, your picture will require no adjustment in some areas and lots of adjustment in others, making the contrast/brightness tool a poor choice much of the time. The curves tool, on the other hand, allows for extremely fine control over the color adjustments. In fact, the levels tool is just a simplified version of the curves tool. While the curves tool gives you lots power, it comes at a price of taking lots of time and patience to master. The levels tool is a compromise between the curves and brightness/contrast tools. It uses much of the power of curves, while keeping most of the "ease of use" of the brightness/contrast tool. In addition, the GIMP has an auto function that makes using the levels tool simpler than the brightness/contrast tool, although occasionally some hand adjustments are necessary. The levels tool is found under the Colors menu, which is located under the Image menu in the GIMP 1.2.x and under the Layers menu in the GIMP 2.0.x. Right-click on the image (in either version) and choose the appropriate series of menus (see figure 7 for a GIMP 2.0 example).
Figure 7: Getting to the levels command in Gimp 2.0.x The little right pointing arrow indicates another menu will open when you put the mouse over it. Left click when you get to Levels. This will open up a new window (see figure 8).
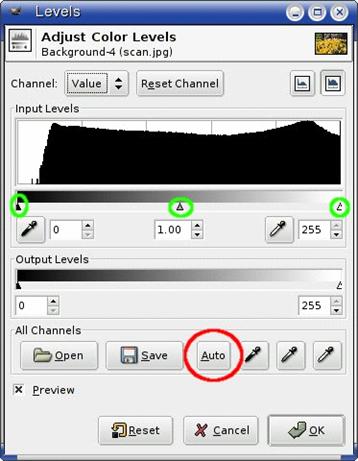
Figure 8: The Levels tool The graph at the top of the window represents the distribution of the 256 shades of gray or brightness (for 8-bit pictures). Each vertical line is the number of pixels of that particular shade of gray. The far left represents pure black and the far right represents pure white. Generally, the more vertical lines in the graph the better. A properly exposed picture will have most to all vertical lines with some value. To have the GIMP auto-magically adjust your picture, just click on the Auto button, circled in red. This can improve a great many pictures and does a very good job (usually!) of adjusting the markers circled in green. If you want, you can hand adjust the picture by clicking and dragging any one of the markers circled in green. The black marker sets the pure black point, while the white marker sets the pure white point. Any pixels to the left of the black marker or to the right of the white marker become pure black or white respectively. The gray marker controls where the 50% black (or white depending on your point of view) is. This affects all pixels between the 2 other markers. In addition to controlling brightness, the Levels dialog also allows you to adjust the individual primary colors (red, green, and blue), called channels. Click on the word "Value" (above the graph, next to the word channel) to get the option to select one of the primary colors. Clicking the Preview check box on and off is a good way to compare the before and after versions of your picture. If you don't like the change(s), simply click cancel. An example of the auto button in action can be found in the other GIMP article in this issue. Robert Spotswood, a HAL-PC member, is active in the Linux SIG and a freelance computer professional. He can be reached at robert@spotswood-computer.net. |
2004 Robert Spotswood, a HAL-PC member, is active in the Linux SIG and a freelance computer professional. He can be reached at robert@spotswood-computer.net |